
Flower Forest Level 122 Answer
For Flower Forest level 122, the answer is E, G, B, D, F, I, H, C, A: slide the clear path sheet over the bottom-right part of the letter board. Follow its line from the solid dot toward the arrow. Enter the letters you cross on the lower parchment and press its flower button.
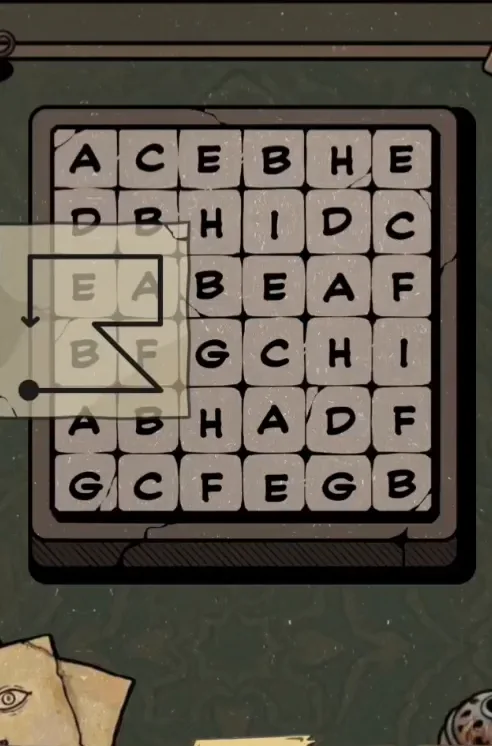
A square gray frame holds six rows of cream-colored letter tiles against a dark green background. A translucent sheet overlaps the left side of the board, carrying an angular black line with a solid dot and an arrow. Cracks run through several tiles and parts of the frame. Paper scraps with an eye drawing sit below the board at the left edge.
Place the Clear Sheet
Use the dot and arrow to establish which way the line should be followed. Its correct placement covers the lower-right block of nine tiles rather than the whole board.
- Take hold of the translucent square that overlaps the left edge of the letter board.
- Slide it onto the bottom-right three-by-three block, aligning the drawn route with the tile centers.
- Trace from the bottom-left dot across the lower row, through the diagonal and around to the arrow.
- Tap E, G, B, D, F, I, H, C, A in that sequence; complete the entry with the flower button.
The right block has C, H, I along its upper edge, A, D, F across its middle, and E, G, B along its bottom. Centering the sheet over these tiles lets each bend land on a readable place. Small shifts matter because the board repeats several letters elsewhere. Leave the square still once the dot rests over E and the line runs across G toward B.
From B the diagonal carries you through D before the route turns right to F. Continue upward to I, left through H to C, and downward to the arrow at A. The diagonal has a letter in its middle, so it contributes more than its two ends. Reading only the corners would skip D and shorten the answer even though the sheet looked correctly placed.
Video: level 122 clear path over letters from start to finish
Follow the clear square as it moves from the board edge into the lower-right corner. The letter entry completes the route before the solved scene gives its flower beneath glass.

Dot Before the Arrow
The filled circle is the beginning of the route, and the arrow is its finish. That gives the picture a direction even though the board itself is a square full of repeated letters. Start at the lower-left corner of the covered block and follow the ink continuously. Do not read each covered row as a sentence; the middle row is crossed in separate parts as the path bends.
Every tile center crossed by the line contributes a letter, including the central D on the slanted stretch. After that crossing, the route reaches the middle-right F and climbs to the upper-right I. It then travels across the upper row in reverse visual order, reaching H before C, and finally drops onto A. The result uses all nine different parchment letters exactly once, even though the larger board contains duplicates.
Keep Every Crossed Tile
A reversed reading can look reasonable because the same black line still visits the same places. Check the two ends: the round dot starts the reading, while the pointed end closes it. Beginning at A sends you backward through the entire clue. This is also why reading the top row first produces the wrong order despite using letters inside the correct square.
If your sequence has only eight letters, return to the diagonal between the lower-right and middle-left parts of the route. The tile D lies along that stretch and cannot be skipped. On the parchment it sits at the start of the middle row, separate from its position on the large board. Moving your finger from board to parchment requires matching the letter, not copying the physical place you just traced.
Frequently Asked Questions
Which letters solve Flower Forest level 122?
Use E, G, B, D, F, I, H, C, A for the overlay board, then press the flower. This route starts at the black dot on E and ends at the arrow on A. It crosses the central D diagonally, so remember that letter when transferring the route to the parchment.
Where should the transparent square sit on the board?
Place the transparent square over the bottom-right nine tiles of the large letter board. The covered rows read C H I, A D F, and E G B from top to bottom. Align its dot with the bottom-left E so the horizontal and diagonal parts of the route cross the intended centers.
Do I follow the arrow backward through the letters?
Begin at the solid dot and travel toward the arrow, which makes A the final letter. Reversing that direction gives the same collection of covered tiles but a different answer. The dot sits on the bottom row of the covered square, so the reading starts there rather than at its upper-left corner.
Why does my route miss the letter D?
D is crossed in the middle of the diagonal, rather than appearing only at a bend. A quick corner-to-corner reading can miss it while still following the overall outline. Trace that slanted line slowly between B and the next turn, then continue toward F without jumping over the center tile.
Where is the picture hint for the overlay puzzle?
The hint button is beside the lower letter parchment, separate from the movable overlay board. It offers a picture clue after an ad. Before using it, check the placement against the covered rows and the dot on E; those visible details give you a direct way to inspect your alignment.
Read next
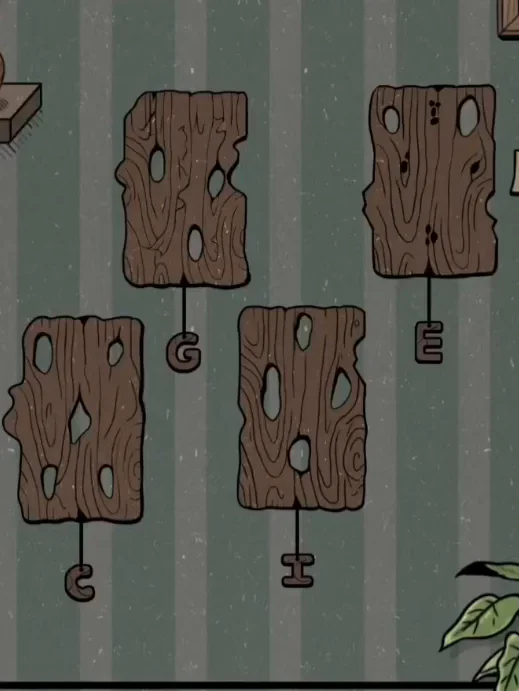


The letter order for every level is in one table on the Flower Forest answers for all levels page. Official store links are on the download page.