
Flower Forest Level 100 Answer
For Flower Forest level 100, the answer is I, H, B, A, G, D, E, F, C: move the arrow notes into the framed squares before entering that sequence. Finish your nine taps with the flower button, which completes the answer.

A wooden frame surrounds nine colored squares arranged in three rows. Small paper notes overlap its edges, with single chevrons, doubled chevrons and groups of arrow marks drawn on them. Pins and paper clips hold several notes against the warm brown wall. A dark curtain hangs beside the right edge, while smaller frames sit to the left.
Place the Arrow Notes
Begin outside the frame, where the loose pieces are waiting, rather than on the letter parchment below. The colored squares provide a separate board for arranging the notes, and that arrangement supplies the clue for your taps.
- Examine the arrow marks on the notes around all four edges of the wooden frame.
- Drag the loose notes inward and place them in the cells of the colored board.
- Check the whole three by three arrangement before switching your attention to the parchment.
- Enter I, H, B, A, G, D, E, F, C in sequence, then use the flower button.
The important change is that the papers leave their scattered positions around the border and become an arrangement inside it. A note hanging above a square has not yet supplied its place in the finished clue simply because the two are close together. Work with the movable papers themselves, keeping the wooden border as the boundary of the puzzle. Looking around the entire frame first also helps you notice notes tucked behind others near the corners.
Once you have moved the notes, pause long enough to compare the occupied cells across the board. Single and doubled marks are visibly different, so avoid treating every upward mark as an identical piece while arranging them. The finished board sets a sequence of positions for the separate letter grid, rather than spelling an ordinary word on the wall. Keep your place in that sequence as you move from arranging the papers to pressing the letters below.
Video: level 100 notes with arrows from start to finish
Watch the arrow papers move from the border into the framed board, then compare the nine letter taps with your own entry. The completed solve ends with a flower beneath its glass dome.

From Arrows to Taps
There are two grids involved in this scene, and separating their jobs makes the solution easier to follow. The framed colored cells hold the movable notes; the parchment holds the letters used to answer. The wall does not need to display a written I or H for those taps to be correct. Its papers establish the order, and you transfer that order to the matching letter positions below. Do the arrangement first so you are not trying to remember an unfinished clue while letters disappear.
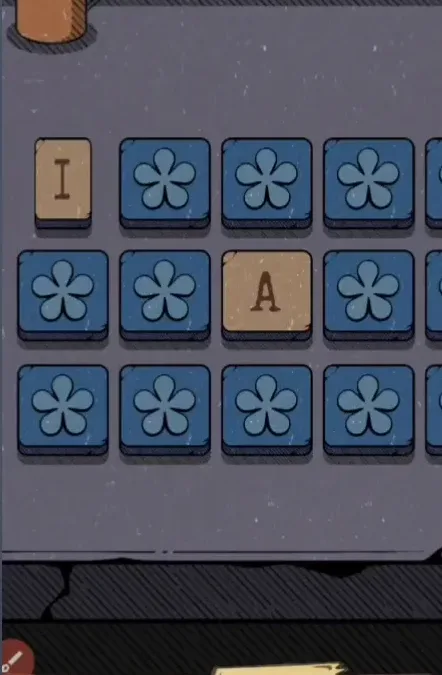
For a quick check on the entry, its opening letter is the bottom-right I on the parchment, followed by H beside it. The sequence then moves up to B, across to A, down to G, and continues through D and E before F and the final C. This is plainly different from reading the parchment across its top row and then moving downward. Every letter belongs in the answer, but membership alone does not settle the order: the first and last taps still matter even when all nine cells will eventually be empty.
Keep the Sequence Intact
A common temptation is to read whatever arrows are easiest to see before placing any paper. That leaves the overlapping border notes mixed with the actual board, so your starting arrangement is incomplete. Move the papers inward before treating their positions as the clue. If the answer you remember starts with A, compare it with the required opening I rather than assuming the alphabetical grid is a suggested route.
An empty parchment can also give a false sense that the puzzle must already be finished. Because this answer uses every letter, even a wrong permutation can remove all nine choices. The reliable check is the order you entered, followed by the flower press and the solved flower display. If the level stays open, review the middle stretch A-G-D-E carefully, where a long sequence is easier to lose than at its two ends.
Frequently Asked Questions
What is the Flower Forest level 100 answer key?
Use I, H, B, A, G, D, E, F, C for the framed arrow notes puzzle. First arrange the papers in the colored cells, then enter the letters below. This is a nine-letter sequence, so do not leave out the last stretch E, F, C before finishing with the flower.
Which papers should I move into the wooden frame?
Move the notes bearing arrow marks from around the wooden frame into its nine cells. The smaller decorative frames and the curtain help identify the scene, but the arrow papers are the pieces used for the clue. Check the corners as well as the top edge before beginning the letter entry.
Does the parchment give the reading order?
The arrow arrangement gives the order; the parchment only supplies A through I as places to tap. Starting across its first row would begin A, B, C and immediately disagree with this solution. Keep the two boards separate in your mind, especially when transferring the first I from the completed paper arrangement.
Why are all the letters gone but the level is still open?
Clearing the letters does not prove that the arrow answer was entered correctly. All nine are used here, so a different order can also leave no letters visible. Check that your taps began I, H, B and ended E, F, C, then finish the sequence with the flower control.
Where can I get a picture hint for these notes?
The hint button beside the letter area offers a picture hint after an ad. Use it while comparing the arrow papers with the colored board, before entering a long run of guesses. The hint is separate from the flower button, whose role is to finish your completed nine-letter answer.
Read next


The letter order for every level is in one table on the Flower Forest answers for all levels page. Official store links are on the download page.