
Flower Forest Level 80 Answer
For Flower Forest level 80, the answer is F, C, B, A, I, D, E, G, H: light the stars by following the arrow clues, then use their numbers to order the matching parchment positions. All nine letters take part in this puzzle. Once the numbered route is entered, press the flower button to complete it.
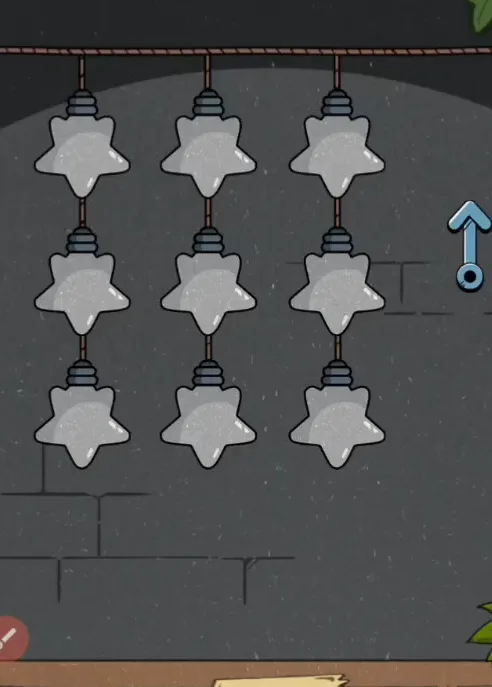
Nine pale gray star lanterns hang in three rows against a dark brick wall. Their cords run vertically from a rope near the top of the picture. A blue arrow points upward to the right of the stars. Green leaves enter at the right edge, and a narrow wooden strip crosses the bottom.
Light All Nine Stars
Use the arrow to guide your taps in the hanging grid, then study the numbers left behind. The important result is a full numbered arrangement, because the letters below use the same three-by-three layout.
- Tap the stars in the arrow-guided sequence until all nine glow yellow.
- Check the numbered rows: 4, 3, 2 at the top; 6, 7, 1 in the middle; 8, 9, 5 below.
- Match numbers 1 through 9 to the letters in the same parchment positions.
- Tap F, C, B, A, I, D, E, G, H, and finish by pressing the flower button.
Start by separating the lighting task from the letter task. Tapping a star changes the scene above the parchment, while entering a letter removes a choice below it. A lit star supplies its own numbered place, so you can check your progress against the developing pattern. Wait for the full set rather than trying to finish the answer from the first few yellow lamps.
The completed arrangement puts 1 at middle right, which corresponds to F. Number 2 sits at upper right, giving C, and number 3 moves to upper middle for B. These first changes show why a simple scan across the top cannot work. Continue finding the next number wherever it appears, using the same position on the parchment each time.
Video: level 80 star lanterns grid from start to finish
Watch the gray lanterns gain yellow light and their numbered places, then compare the matching letter taps. The solution ends with the flower enclosed beneath a dome.

Numbered Positions Become Letters
Think of the two grids as matching windows: the star in the top-left corner belongs to the letter in the top-left corner, and so on. The printed number tells you when to use that position. At the top, 4, 3 and 2 correspond to A, B and C. In the center row, 6, 7 and 1 correspond to D, E and F. At the bottom, 8, 9 and 5 correspond to G, H and I.
Now read by increasing number rather than by row. The route starts on F, rises to C, crosses through B to A, then jumps to I. After that come D and E, followed by G and H. You use the lower-right I well before the other two lower letters, a useful checkpoint halfway through. The final H comes from number 9 in the bottom-middle star, even though that star is not at the far right of its row.
Stop Reading Across Rows
If you read the numbers as 4, 3, 2, 6, 7, 1, 8, 9, 5, you have described the finished picture but have not followed its route. The answer starts at the star marked 1, even though it sits midway down the right column. Find that starting point first. Only then move to 2 and continue, using the numbers to choose direction instead of assuming an ordinary reading line.
Another easy slip is ending when most of the parchment has emptied. This answer uses every available letter, and G followed by H still matters after the earlier seven taps. Compare your place with the final numbered stars rather than treating the remaining letters as optional. The route is complete when the bottom-left and bottom-middle positions have supplied the last two entries.
Frequently Asked Questions
What is the complete star lantern answer for level 80?
Enter F, C, B, A, I, D, E, G, H for the nine star lanterns. The order follows numbers 1 through 9 on the illuminated stars, mapped to the matching letter positions. Every parchment letter is used, and the flower control completes the entry after H.
How do the gray stars reveal their numbers?
Tap the star lanterns using the arrow-guided sequence to light them yellow and reveal numbers. The finished rows read 4, 3, 2 above 6, 7, 1 and then 8, 9, 5. Use that completed arrangement to check the clue before transferring it into the parchment below.
Why does the answer begin at F instead of A?
Number 1 is on the middle-right star, matching F on the letter parchment. A matches the top-left lantern, but that lantern is marked 4. The two grids share positions while the numbers decide the timing, which puts A fourth rather than first in the solution.
Where does I belong in the lantern sequence?
I is the fifth entry because its matching lower-right star carries number 5. That position can be misleading if you are sweeping across rows instead of following the numbers. Check this jump after the first four taps, then return to the middle row for D and E.
Where is the hint control for the star lanterns?
The hint control is beside the parchment underneath the star lanterns and offers a picture after an ad. Before opening it, compare the numbered lamps with the matching letter positions. The blue arrow beside the stars belongs to the scene clue, while the help button sits below near your answer choices.
Read next



The letter order for every level is in one table on the Flower Forest answers for all levels page. Official store links are on the download page.