
Flower Forest Level 8 Answer
F, C, B, E solves Flower Forest level 8: remove both golden keys from their hooks and overlap them in the center to reveal F and the directional arrows. Follow the clue upward, left and down on the letter grid, then complete the answer with the flower button.

Two long golden keys hang from separate brown hooks on a horizontal wooden rail. Their round heads sit just below the hooks, and their toothed edges face inward toward the gap between them. The left key has several slanted cuts, while the right has a mix of squared and angled notches. Blue-green vertical stripes cover the wall behind the rail and keys.
Overlap Both Golden Keys
Take both keys away from the hooks before trying to interpret their edges. The useful marks appear in the combined shape at the center, so inspecting each hanging key separately leaves the clue unfinished.
- Lift the left golden key off its brown hook.
- Bring the second key down from the other hook as well.
- Overlap the keys in the middle until they form one combined key.
- Find F and follow the arrows upward, leftward and downward on the letter grid.
- Tap F, C, B, E, then press the flower button after the final E.
The two inward-facing edges are parts of the same clue. Bringing the keys together lets their cuts be seen as a combined shape instead of two separate sets of teeth. Look at the result in the central area, where the starting F and small arrows become useful. The wooden rail tells you where the objects begin, but it does not provide another part of the sequence.
Moving just one key away from its hook is not the full action. You need both objects together before reading the marks, because neither hanging edge supplies the finished instruction alone. Once they overlap, pause and separate the starting letter from the directions that follow it. That makes it easier to use the clue without mistaking each arrow for a letter drawn on the key.
Video: level 8 golden keys and arrows from start to finish
Follow the golden-key walkthrough to compare the overlap and the resulting answer taps. The clip reaches the successful finish, with a flower inside the glass dome.
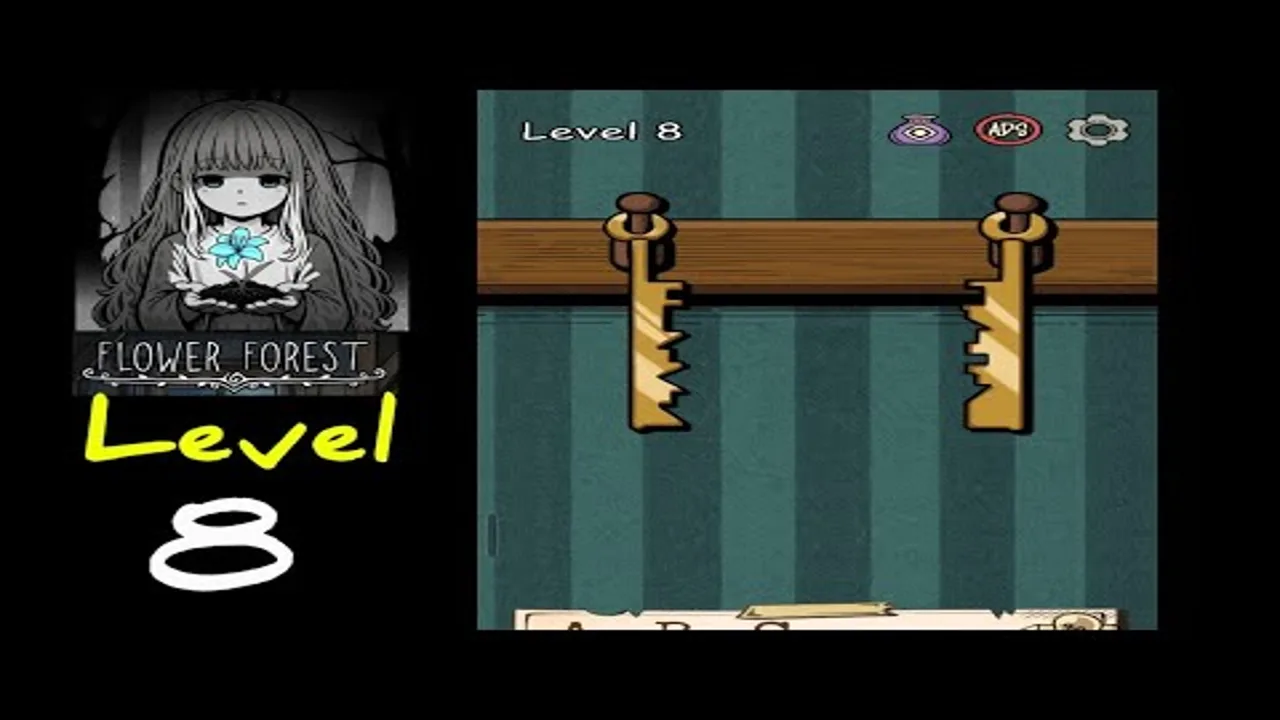
Start at F
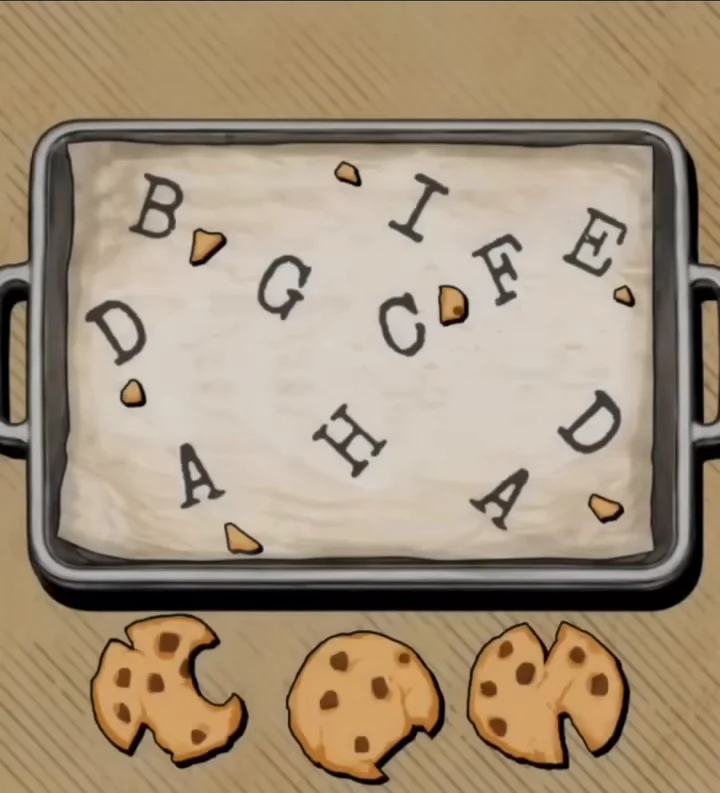
F is at the right of the middle row on the parchment. Moving up from there reaches C in the upper-right corner, so C is your second choice. Now move left from C, arriving at B in the upper-middle square. The last arrow points down from B into the center E. Each arrow continues the journey from your current square; it does not send you back to F to begin again. That short chain gives the complete four-letter answer.
The key itself is not a map of four letter positions. It gives you a starting mark plus instructions to use on the separate grid below the drawing. Distinguishing those two jobs helps when the little arrows look crowded together. Read the directions first, locate F on the parchment, and trace the route mentally before entering anything. You can check the destination of the last move easily: it ends in the center square, rather than at the bottom of the grid.
Carry Each Arrow Forward
If your route leaves the grid, check whether you started from the correct F. It sits in the middle-right position, with C immediately above it. Also check that you continue from C for the left arrow and from B for the down arrow. Starting every direction anew from F produces different destinations and loses the path the clue is describing.
If you cannot find the directional clue at all, return to the two keys rather than inspecting the striped wall. Both should be removed from their hooks and placed together in the central area. Their separated starting shapes are not yet the combined instruction. Once you can distinguish F and the three arrows, finish reading before selecting letters, because every selected choice disappears from the parchment.
Frequently Asked Questions
What is the answer for Flower Forest level 8?
The golden-key scene is solved with F, C, B, E and then the flower control. Take both keys off the hooks and overlap them centrally to reveal the instruction. The F is a starting letter; the small arrows tell you how to find the remaining three choices on the parchment.
How can I make the golden-key clue appear?
Combine the two golden keys in the center after removing both from their hooks. Reading them while they still hang separately does not give the finished clue. Their overlapping shape supplies the F and arrows you need, so look at the joined result rather than at the rail behind it.
How do the arrows turn F into the answer?
From F, move up to C, left to B, and down to E on the parchment grid. These are consecutive moves, so each one begins where the last ended. Read the small directions on the combined key, then apply them to the squares instead of looking for more written letters.
Should each arrow start over at F?
Only the first arrow starts at F in the golden-key puzzle. After moving upward you are at C, which is the starting square for the left turn. Then B is the starting square for the down turn. Resetting to F for every direction breaks that connected three-move path.
Where is the picture hint for the golden keys?
Find the hint button beside the parchment letters beneath the golden-key drawing. It gives a picture hint after an ad. Use the clue to check the combined key and its arrows before making your choices; losing a tapped letter from the grid only records a selection, not whether its direction was right.
Read next


The letter order for every level is in one table on the Flower Forest answers for all levels page. Official store links are on the download page.