
Flower Forest Level 48 Answer
Enter A, C, D, H to solve Flower Forest level 48 after spreading the bear sections vertically to expose three black bands. Treat the marks on those bands as a small grid, follow the numbers, and check your entry with the flower control.
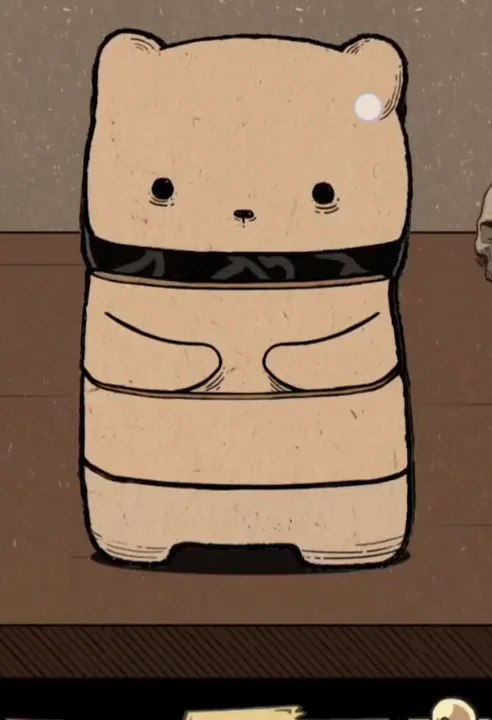
A beige bear-shaped block stands on a brown tabletop with its body divided by horizontal seams. It has rounded ears, small black eyes, a tiny nose and curved lines marking its arms. A narrow black strip with faint gray marks is visible below its head. Part of a pale skull appears at the far right, and the thick front edge of the table runs across the bottom.
Expose Three Black Bands
The thin dark strip under the head is a useful sign that the bear contains more than a plain outline. Increase the vertical space between the beige sections until you can inspect all three rows of markings.
- Move the bear sections apart vertically, opening the dark spaces between the beige pieces.
- Reveal three full bands and read their rows as 1 X 2, then 3 X X, then X 4 X.
- Match those nine places to the letter grid and follow the digits from 1 through 4.
- Press A, C, D, H on the parchment and use the flower button once H has been entered.
In the compressed bear, the large pale face attracts attention while most of the marked black areas are concealed between body sections. Separating the sections changes that balance: three broad dark strips become visible, one above another. Work on revealing their full height instead of trying to make a clue from the curved arm outlines. Those outlines stay part of the bear drawing, whereas the dark bands provide the numbers needed for the answer.
When the bands are open, inspect each row all the way across before choosing a letter. The top strip contains two digits with an X between them, the middle strip begins with 3, and the bottom strip places 4 between two X marks. This complete layout matters more than simply spotting the digits somewhere on the body. It lets you compare the bear clue with all nine parchment positions, including the places that should not be tapped.
Video: level 48 bear block with skull from start to finish
Follow the bear sections opening vertically and compare all three dark bands with the parchment. The walkthrough reaches the completed puzzle and the pink flowers beneath a glass dome.

Map Each Numbered Place
The top row maps to A, B and C, so the 1 at its left selects A and the 2 at its right selects C. The middle row maps to D, E and F, making the left-hand 3 a D. Along the bottom, G, H and I match the final band, where the centered 4 picks H. Following the numbers gives the order of taps even though reading every mark across the bands would also include several X symbols. Those X positions are deliberately skipped.
This clue uses position rather than a drawing of capital letters. You will not find a large A shape in the ears or a C hidden in the bear arms; instead, imagine laying the three marked bands over the three letter rows. Keep the columns lined up during that comparison, especially when looking down from the top strip to the bottom one. After the four matches are clear, enter the letters by digit order, leaving B, E, F, G and I untouched.
Keep the Bottom Centered
If only one black strip is visible, there is not enough of the clue exposed to read the full grid. Continue separating the horizontal sections so the lower marked bands can be inspected too. The skull beside the bear does not supply the missing row of numbers in this solution. Focus on the spaces within the bear, where the arrangement changes from a narrow glimpse of markings into three readable lines.
If your first three taps seem right but the result fails, return to the bottom band and compare its columns with the parchment. Placing 4 at the left would select G, while its actual centered position selects H. Likewise, X is a skipped space rather than an instruction to add another letter or restart your count. Read the complete grid before entering anything so the letters disappearing below do not interrupt your comparison of the three bands.
Frequently Asked Questions
What solves the bear block on Flower Forest level 48?
The bear block is solved with A, C, D, H and the flower control. Open its body sections to expose the black bands, then map the numbered places onto the parchment. The 4 belongs in the lower middle, so H completes the sequence after the two upper-corner letters and middle-left D.
How do I uncover the numbers inside the bear?
Spread the bear sections vertically until three dark bands are visible between the beige parts. A single narrow strip under the head is only the starting glimpse of the clue. You need the top, middle and bottom lines exposed together so their columns can be compared with the letter buttons below.
What is the full pattern on the black bands?
The bear bands read 1 X 2 across the top, 3 X X across the middle and X 4 X across the bottom. Compare those places with A-I on the parchment. Each number identifies the next letter to select, while the X marks show positions that are left out of this answer.
Does the skull beside the bear contain another clue?
The solution here comes from the bear bands rather than the skull beside the table scene. Once the sections are open, the numbered three-row pattern provides all four required letter positions. If the last tap is confusing, inspect the centered 4 on the bottom band instead of looking for an additional symbol nearby.
Is a disappearing A proof that I read the bear correctly?
A disappearing A records your tap, but does not independently check the bear clue. Any parchment letter vanishes when touched. Continue with the remaining planned letters and finish using the flower control; the successful result is the flower display beneath glass, after the complete sequence has been checked.
Read next


The letter order for every level is in one table on the Flower Forest answers for all levels page. Official store links are on the download page.