
Flower Forest Level 113 Answer
The answer for Flower Forest level 113 is A, D, I, H, C, E, F, G, B: erase the dark smudge, then shine the purple flashlight over the parchment grid. An older scene has green soccer maze pieces and takes G, H, F, E, D, I, A, B instead. Use the flower button after the sequence for your picture.

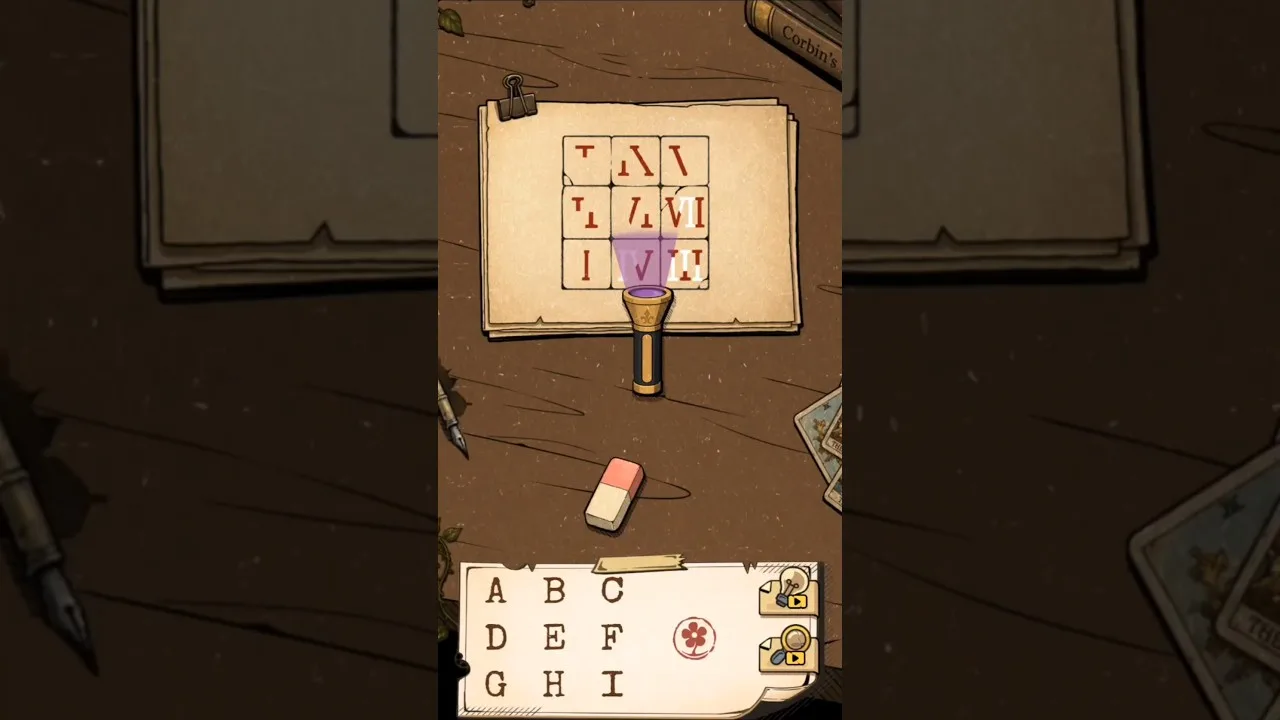
A stack of yellowed paper lies on a scratched wooden desk, held by a black clip at its upper left corner. A square grid on the top sheet contains red strokes partly covered by gray smudges and rough black scribbling. A pink-and-cream eraser rests beside the grid, and a gold-and-black flashlight casts a purple beam at the right. A pen tip and pieces of printed paper are partly visible near the lower edges.
Erase Before Using Light
There are two tools beside the paper, and each has a different job. Clear away the scribbling first so the flashlight can help you inspect complete numerals rather than fragments beneath a dark patch.
- Drag the eraser over the dark smudge and scribbled areas of the grid.
- Move the purple flashlight across all nine cells to expose the complete Roman numerals.
- Match each cell to its letter position and follow numerals I through IX.
- Tap A, D, I, H, C, E, F, G, B, then press the flower button.
The eraser removes the dark covering, but the first red strokes alone do not give the whole reading. Sweep the flashlight across the cleared cells and look for the added pale strokes that complete the signs. A cell that initially looks like V can belong to a longer numeral when the rest becomes visible. Check the entire grid before making the first letter selection.
Next, treat the nine squares as a copy of the letter grid below: A, B, C at the top, D, E, F across the middle, and G, H, I at the bottom. Find numeral I in the upper left cell and take A first. The following numerals lead you away from that row rather than straight across it. Count their values from one to nine to choose the remaining letters.
Video: level 113 Roman numeral parchment from start to finish
Follow the eraser across the paper and the purple beam across the cleared numerals. Compare the completed grid before copying the long letter sequence.
Count Values, Keep Positions
Follow I at A, II at D, III at I, IV at H and V at C. The last four values are VI at E, VII at F, VIII at G and IX at B. This is a counting route through fixed cells, so the paper itself does not need to be rearranged. The Roman numerals tell you when to select each corresponding letter.
Remember that an I before V makes IV, or four, while an I after V makes VI, or six. IX uses the same idea with X to make nine. Reading only the red pieces before using the flashlight can hide those differences. Once the signs are complete, compare each numeral with its cell and avoid treating I, V or X as extra answer letters; the entry uses the A-I parchment positions.
Earlier Soccer Hedge Maze
The older level 113 uses green hedge-like maze pieces on sandy ground. Its picture includes soccer balls and a small goal rather than a desk or flashlight. For that version, the answer is G, H, F, E, D, I, A, B.
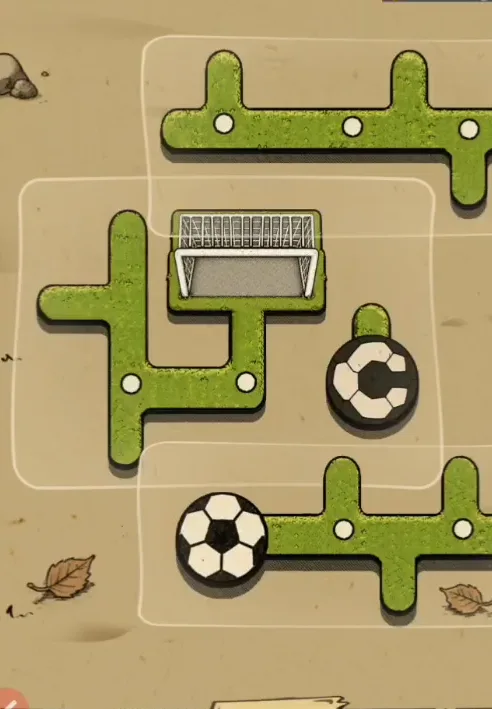
- Drag the separate green hedge pieces closer together.
- Rotate the pieces to connect their ends into a continuous route to the ball.
- Trace the joined path beginning at G.
- Enter G, H, F, E, D, I, A, B and finish with the flower button.
Follow the connected hedge path from its G starting position instead of counting Roman numerals. The route winds through the scene, so a straight scan across the sandy ground misses its order. Keep the eight-letter maze entry separate from the nine-letter desk answer, even though both scenes have appeared under number 113.
Check the Hidden Strokes
When the numeral route seems to contain repeated or missing values, look for a stroke that the flashlight still needs to reveal. A partly visible numeral can look shorter than it really is. Recheck the cell before deciding that two squares carry the same number. Keeping the paper clean and the full signs visible is more useful than trying to guess a missing letter from the unfinished red shapes.
Do not enter the Roman letters themselves on the answer parchment. The numeral I names the first value, which corresponds to A in this scene; it does not ask for I as your first tap. Likewise, the older green maze follows a path rather than number values. Identify the desk or soccer picture before choosing which reading method and sequence to use.
Frequently Asked Questions
What is the Flower Forest level 113 parchment answer?
A, D, I, H, C, E, F, G, B is the answer for the desk and Roman numeral grid. Remove the smudge with the eraser, then reveal the remaining strokes using the purple flashlight. Follow numeral values in increasing order and finish the entry with the flower control.
Why do I need both the eraser and flashlight?
The eraser clears the dark covering, while the flashlight reveals strokes needed to read the full Roman numerals. Using only the red marks on the dirty page leaves incomplete signs. Clear the grid first, then inspect every cell under the purple beam before matching the values to the letter positions.
How does the numeral grid turn into letters?
Match each paper cell to the same position in the A-I letter grid, then count from I to IX. The first value is at A, the second at D and the third at I. Continue through the numeral values rather than reading the paper across its rows as ordinary text.
What if level 113 contains soccer maze pieces?
Use G, H, F, E, D, I, A, B for the older green maze scene. Drag and rotate the hedge-like pieces until their ends connect, then follow the path from G. That version has soccer balls and a goal on sandy ground, so the desk tools and numeral order do not apply.
Does tapping I first work because the first numeral is I?
No, the first numeral I belongs to the upper left paper cell, which corresponds to A on the letter grid. I is the third tap in the desk solution because numeral III occupies the lower right position. Keep numeral values and parchment letters separate when entering this nine-step route.
Read next

The letter order for every level is in one table on the Flower Forest answers for all levels page. Official store links are on the download page.